
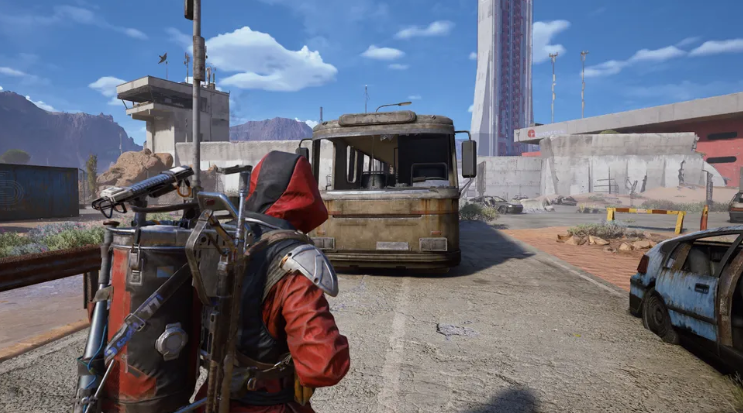
Added as part of the Riven Tides update in Arc Raiders, “A Wrench in the Works” is the final quest in the update’s lineup-and one of the most straightforward to complete. Unlike some of the game’s more challenging raids, this quest features only two main objectives, can be split across multiple in-game runs, and takes place entirely on the Spaceport map. Whether you’re a new player or a seasoned raider, this step-by-step guide will help you finish the quest efficiently and claim your rewards.
Before diving in, it’s important to note a few key details: You don’t need to extract successfully to progress the quest, so feel free to use a free loadout to avoid risking your favorite gear. Additionally, while the two objectives must be completed in order, you don’t have to finish both in a single game. This flexibility makes the quest accessible even if you’re short on time or prefer to take things at a slower pace. You may receive additional ARC Raiders BluePrints and other rewards as a result.
Step 1: Prepare for the Quest
First, ensure you have access to the Spaceport map. “A Wrench in the Works” is exclusive to this location, so you’ll need to queue for Spaceport in your mission selector. If you’re new to the map, take a moment to familiarize yourself with its general layout-focus on the Departure Building, Western Gate, and Water Towers, as these are the key areas you’ll visit.
As for loadout, there’s no strict requirement, but a balanced setup works best. Since you won’t need to fight heavy enemies (unless you choose to engage in PvP), prioritize mobility and utility. A light weapon and a grappling tool can help you move between objectives quickly, especially when navigating the Water Towers later on. Remember: You can use a free loadout to play it safe, so there’s no need to waste rare gear here.
Step 2: Search the Buses Near the Western Gate
The first objective of the quest is to search the buses located near the Western Gate of the Spaceport. The Western Gate is a long road leading to the main complex, situated north of the Departure Building-don’t confuse it with the road next to the Shipping Warehouse, as this is a common mistake.
To find the correct buses, head to the area directly north of the West Elevator evacuation point. Here, you’ll see several buses parked along the road. You don’t need to search all of them-any one of these buses will work, but the easiest to access is the one closest to the center of the highway, surrounded by scattered cars.
Once you’ve located a bus, enter through the front door and move to the driver’s seat. Look for an interact prompt (usually a small icon or on-screen message) and press the interact button. This will complete the first objective, and your quest log will update to direct you to the next step.
Step 3: Locate the Hidden Sabotage Supplies at the Water Towers
After searching the bus, your next task is to find the hidden sabotage supplies at the Water Towers. These towers are located on the far western edge of the Spaceport map, a short trek west from the Western Gate buses. Depending on your spawn location, this may take a few minutes, but the path is straightforward-just follow the map’s western border until you see the tall water towers.
When you reach the Water Towers, focus on the northernmost tower. This is where the supplies are hidden, and it’s the only tower you need to enter. The entrance is open, so you can walk right in without needing to break through any barriers.
Inside the tower, you’ll find climbable platforms (made of pallets and boxes) directly in front of you. Mantle up these platforms until you reach a circular landing. Once you’re on this landing, turn around-you’ll see a stack of metal containers with an interact prompt labeled “Transmit Location.”
Press the interact button to transmit the location of the sabotage supplies. You’ll hear a short dialogue from Celeste (the quest giver), confirming that you’ve completed the second objective. At this point, the quest is officially finished-you don’t need to extract to claim your rewards, but you can do so if you want to collect additional loot from the run.
Quest Rewards and Final Tips
Completing “A Wrench in the Works” unlocks several valuable rewards, including the Yellow (Radio Renegade) appearance, five Mechanical Components, and three Mod Components. These rewards are useful for upgrading your gear and customizing your character’s look, making the quest well worth your time.
To make the quest even easier, keep these tips in mind: If you’re having trouble finding the Western Gate buses, use your map to mark the Departure Building- the buses are just north of it. For the Water Towers, stick to the northernmost tower to avoid wasting time on the other towers. Additionally, if you die between objectives, don’t worry-your progress will be saved, and you can pick up where you left off in your next run. If you are short on resources, you can choose to purchase cheap ARC Raiders Materials, items, and other goods on MMOEXP.
Overall, “A Wrench in the Works” is a simple yet rewarding quest that offers a break from Arc Raiders’ more intense raids. By following these steps, you’ll complete it in no time and add valuable rewards to your inventory. Now grab your gear, head to the Spaceport, and help Celeste locate the hidden supplies!


